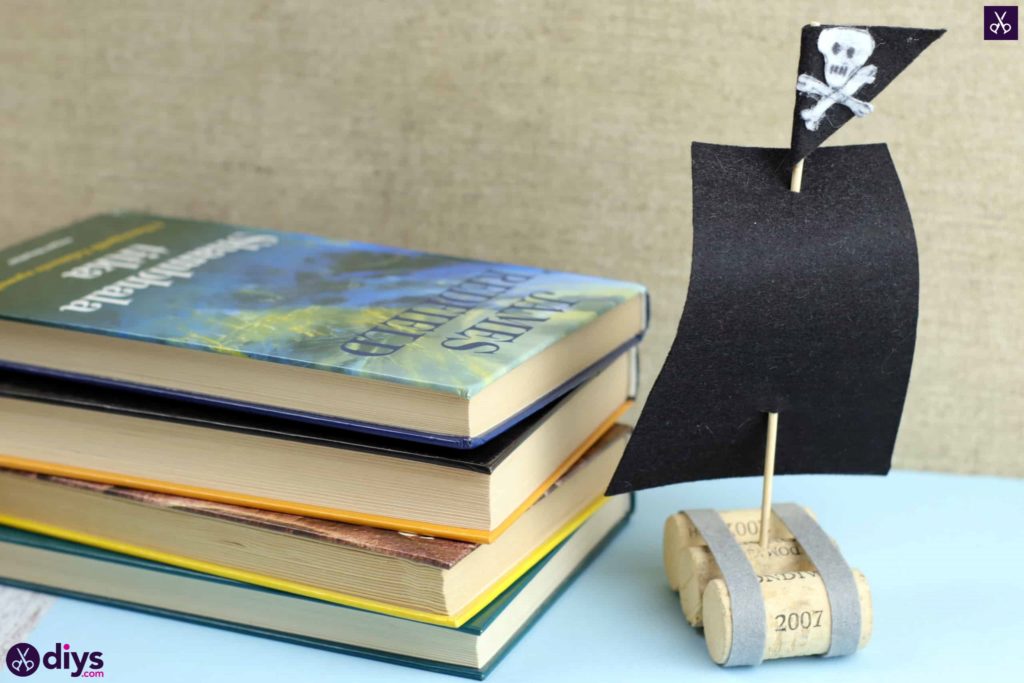
How To Recycle Wine Corks Into a Kids Pirate Ship
Have your kids ever read a book or seen a movie and immediately fallen so in dear with one aspect of the storyline that they of a sudden want to incorporate that person or idea into only about anything they do? Well, our kids get through a stage similar this with new and different things just nigh any time they see an exciting new movie or hear a new story for the first fourth dimension, but that doesn't mean at that place aren't one or two themes that accept really stuck around. Whenever this happens, I always try to discover cute, like shooting fish in a barrel ways to contain any the thing they beloved most in that moment is into our "crafternoons", only to keep them feeling equally excited as possible virtually DIY projectsand their other interests all a once. Lately they've had a rather pervasive involvement in pirates, which is how I came upward with this super cool DIY wine cork pirate send idea that really floats!
By now, our kids have fabricated and so many of these funny little cork pirate ships that they practically run a whole fleet. As usual, I fabricated sure to certificate the whole DIY procedure of how they're made so I could share information technology with other crafty parents whose kids love pirates and pirate ships only every bit much as ours exercise. Check out these step by step instructions complete with photos! If y'all'd rather follow along with a video tutorial instead of written words, scroll to the bottom of this post to find just what yous're looking for.
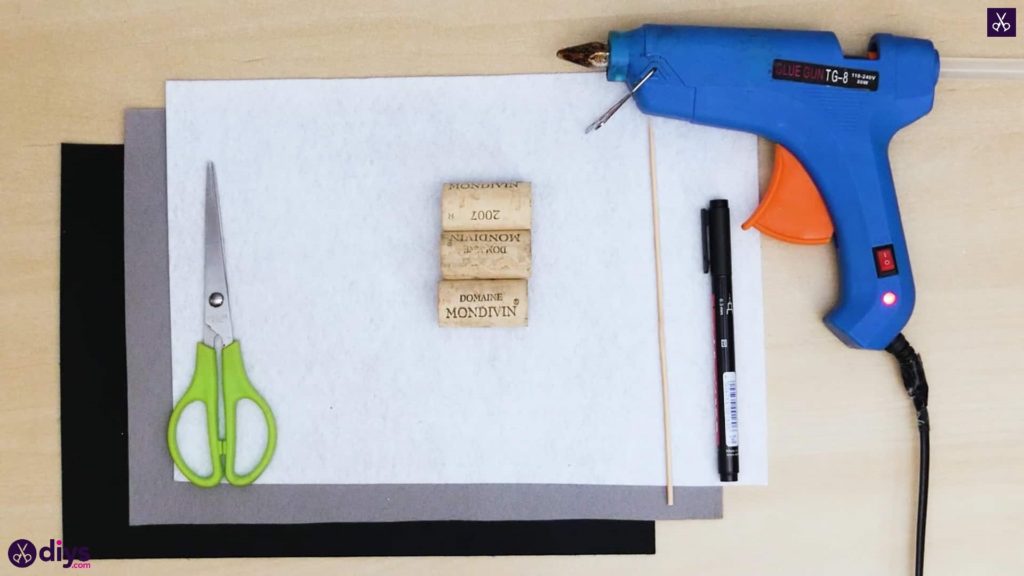
For this projection, you lot'll demand:
- Three wine bottle corks
- Felt (greyness, black, and white)
- A black mark
- Scissors
- Hot glue
- A wooden kebab skewer
Step one:
Gather your materials!
Step 2:
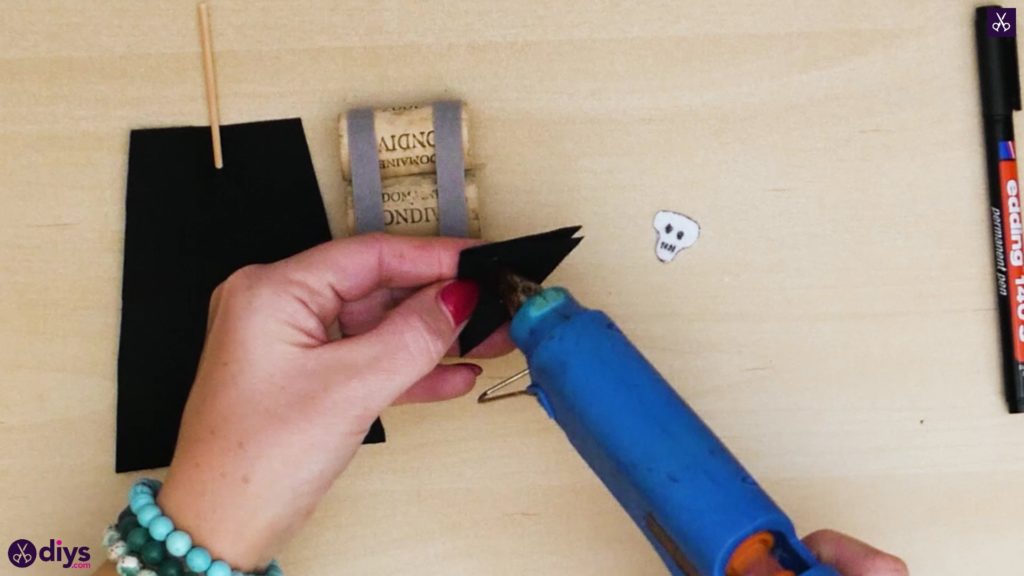
First, cut out a 2 inch past two inch square from your white felt and use your black mark to draw the shape of a skull and the shape of cross basic, complete with heart sockets and tooth details; this will be part of your ship's pirate flag. Cutting the skull and cross bones out and set them aside for a moment.
Step iii:
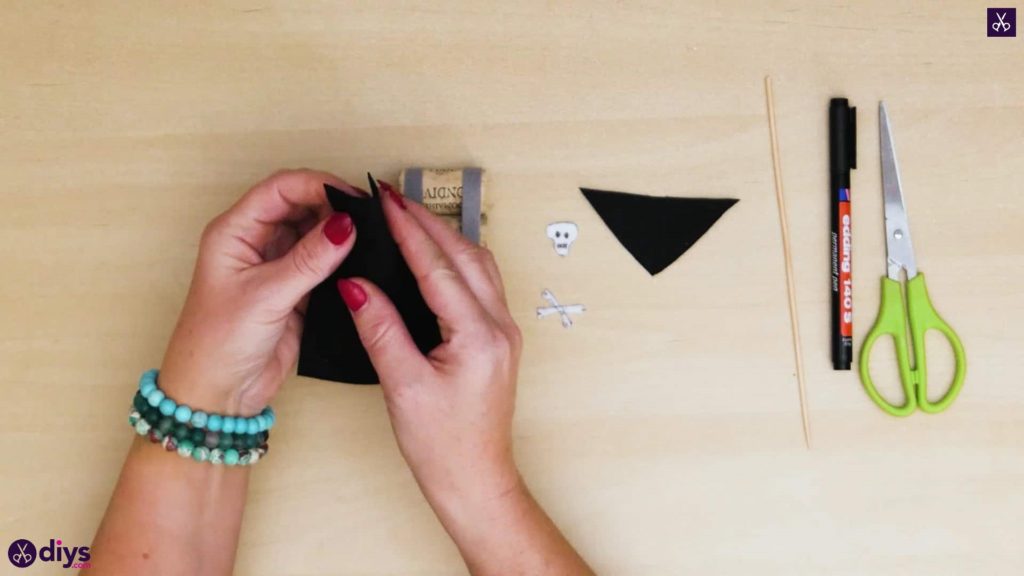
Cut 2 long strips from your grey felt. These will be the "ropes" that hold your cork ship together. I made mine about a centimetre wide and the whole length of my felt sail's shorter edge.
Step 4:
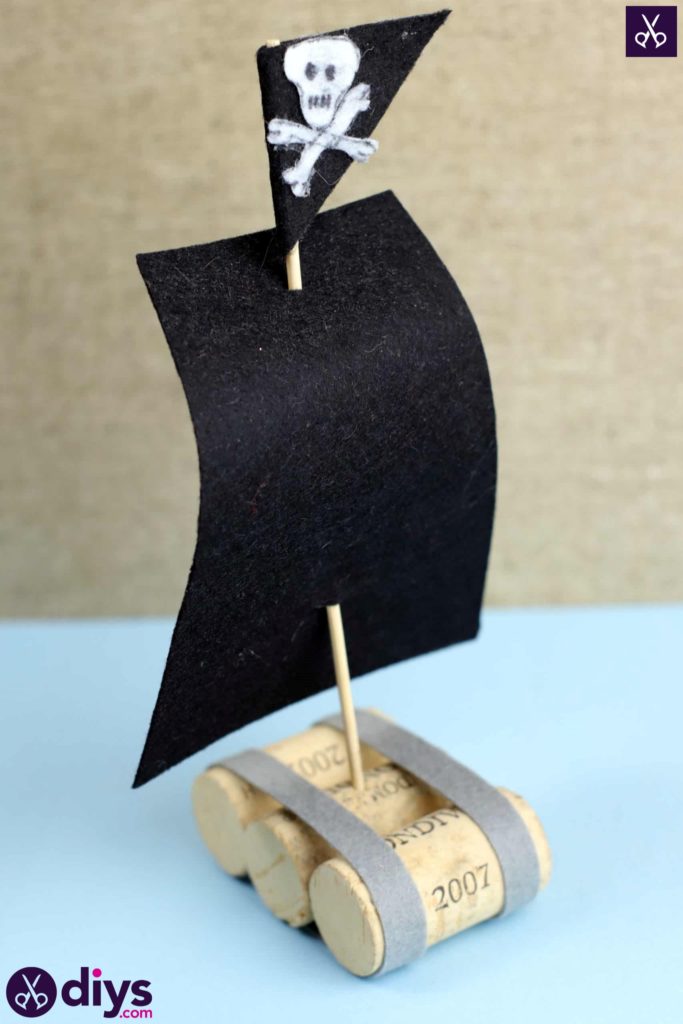
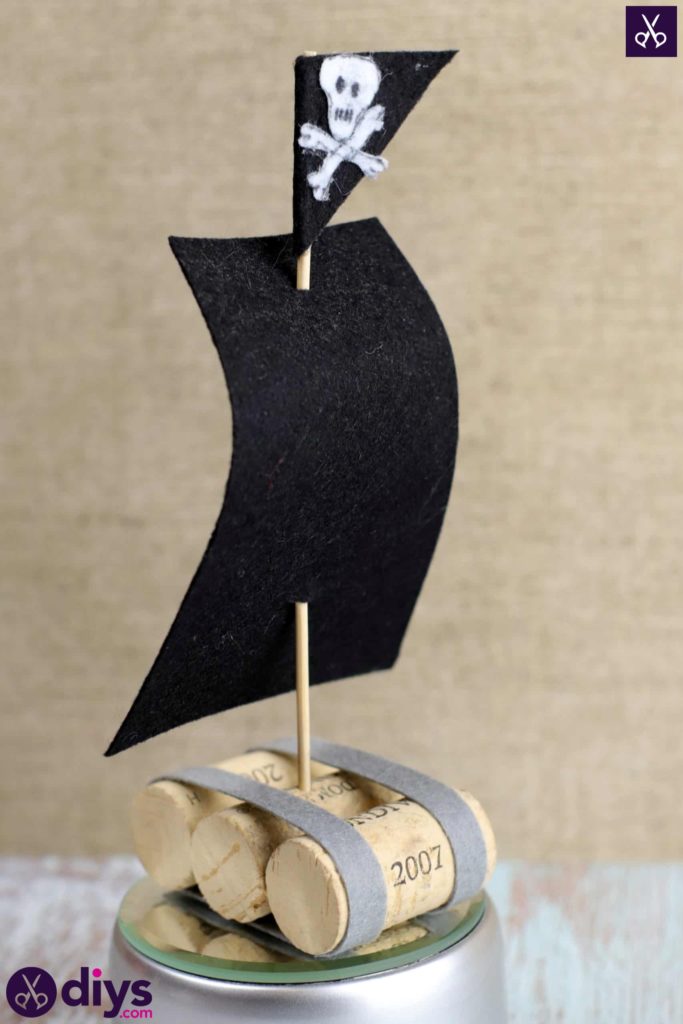
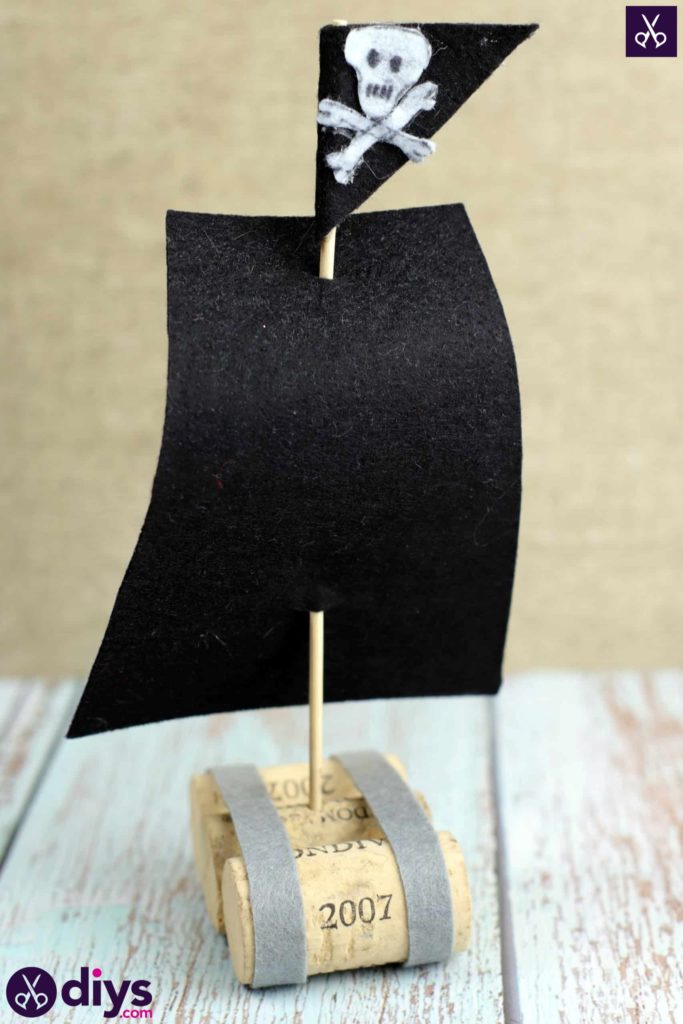
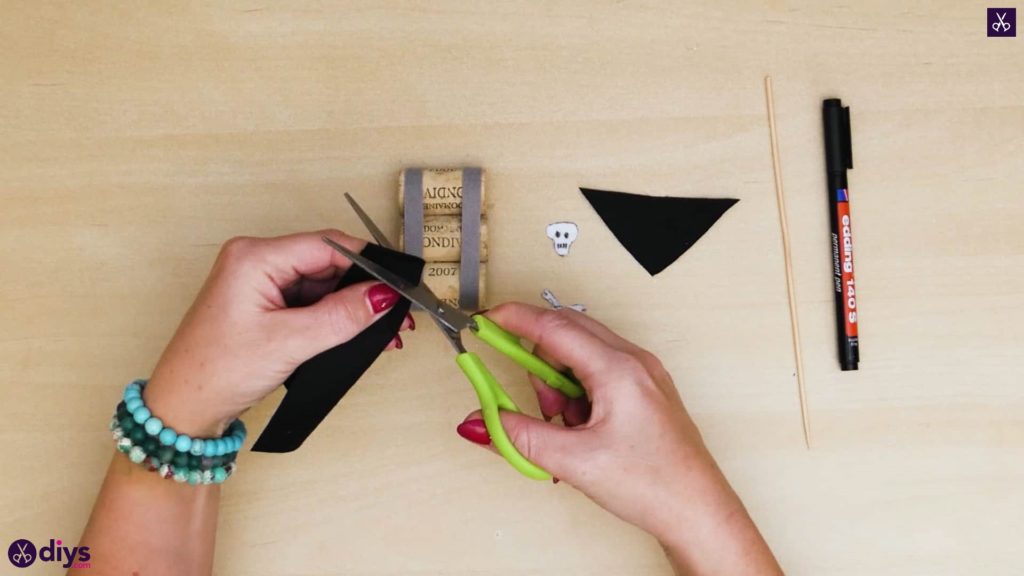
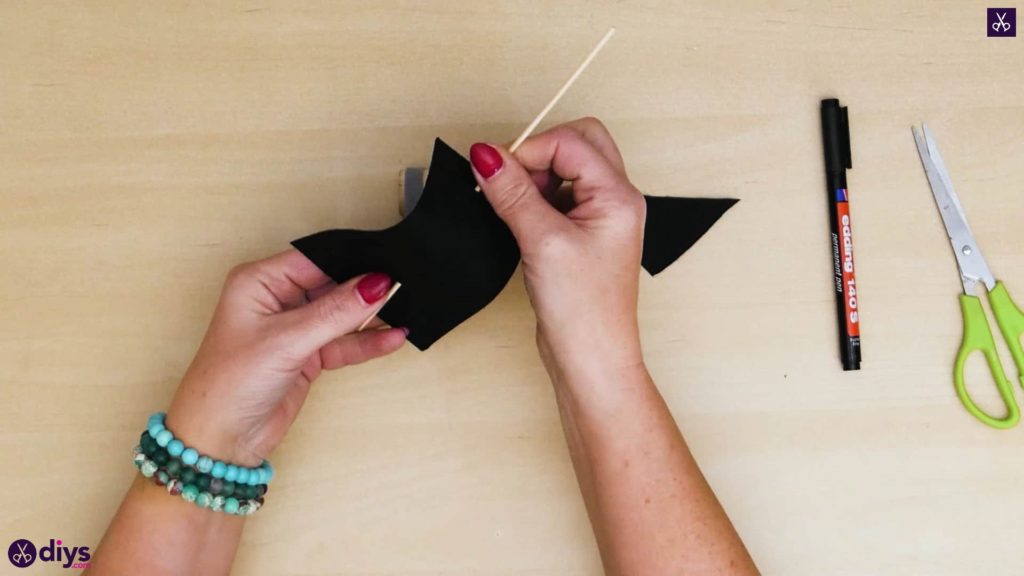
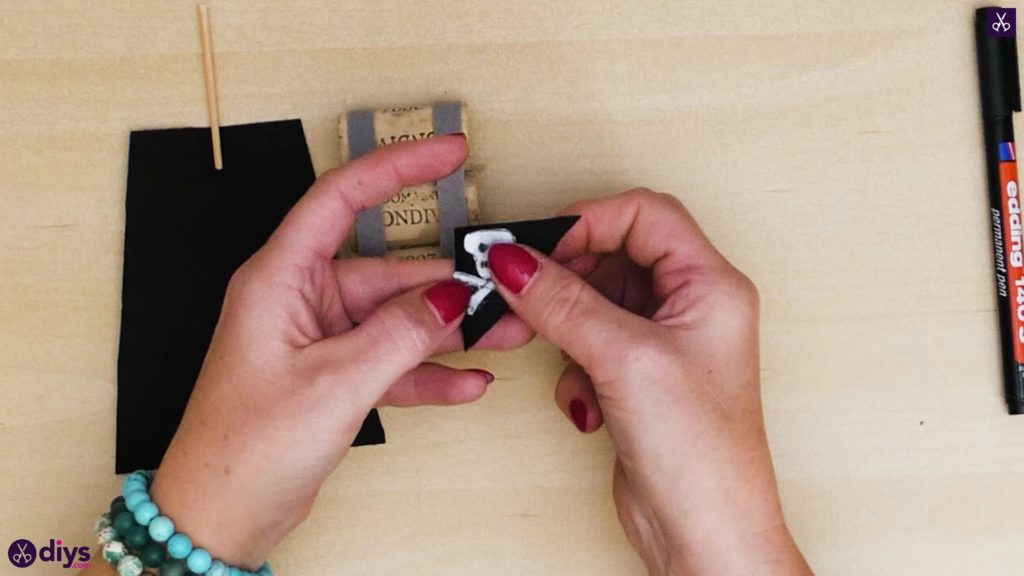
Cutting a rectangle about two inches by iii inches from your sheet of black felt. Turn the rectangle and then it is taller than it is broad and cut a slight angle into the tall sides of your rectangle to brand it shaped more like a parallelogram instead. This will exist the base of operations of your pirate ship'south sail, with the more narrow end at the elevation and the wider terminate at the bottom. Next, pick your black felt canvass up again and cutting a triangle that's about 2 inches wide on the bottom and and sides that run on even diagonal sides upward to a point that's right above the centre of the triangle's bottom edge. A really easy style to do this is to cut a square, fold it in half side to side, and then use your scissors to cut diagonally from one lesser corner, across to the contrary top corner. When you open it, y'all'll have the correct triangular shape nosotros merely talked about. This volition be the base of the classic little skull and cross bones pirate flag at the top of your sail.
Step v:
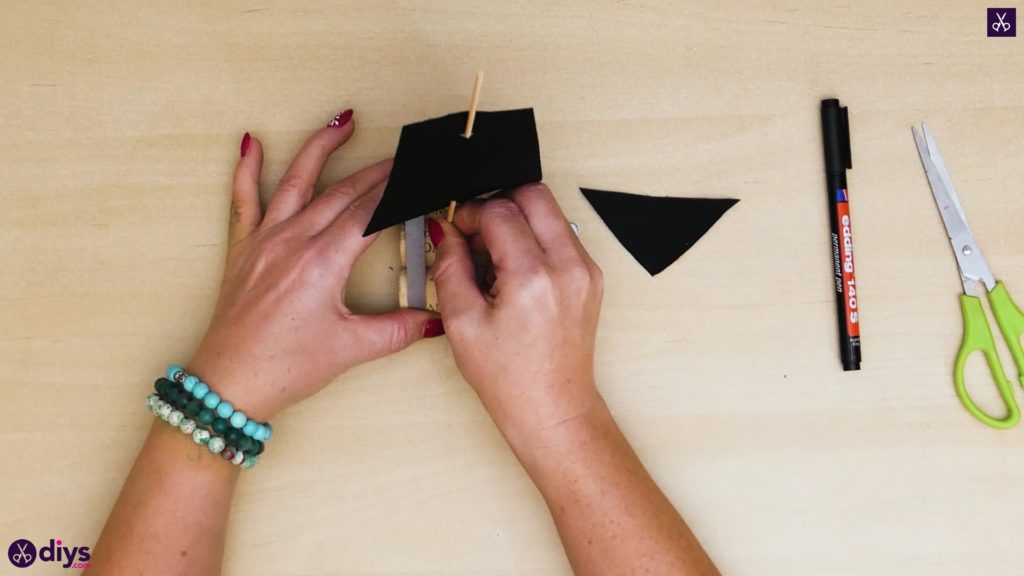
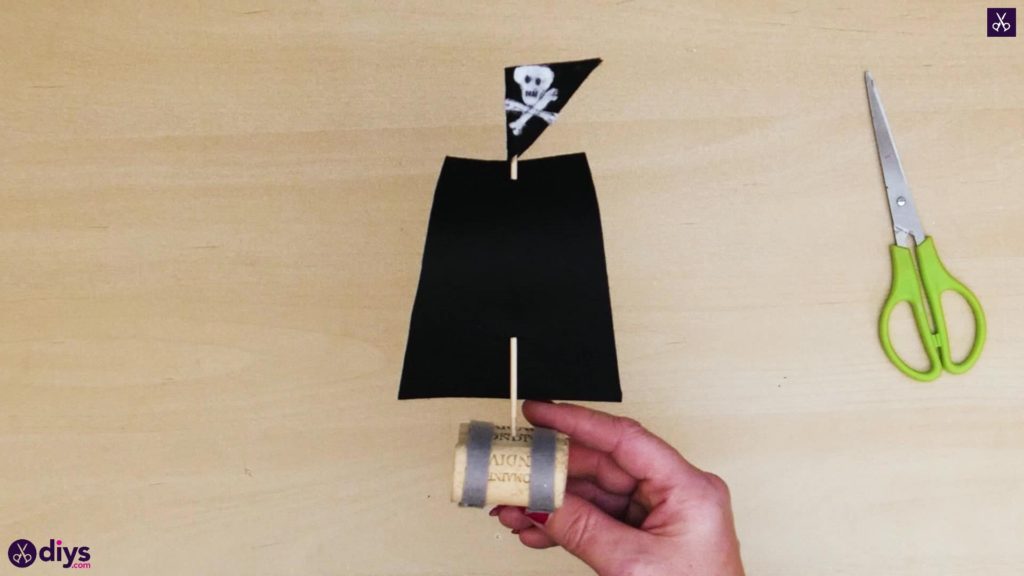
Attach your corks together to make the body of the ship! Employ glue all downward the long side of one cork and stick it to the long side of your second cork, keeping the two ends even with each other. Then apply mucilage in the aforementioned spot in the opposite side of that 2d cork, sticking the third cork into place there. Feel free to apply the tabletop as a guide to keep your corks even and flat.
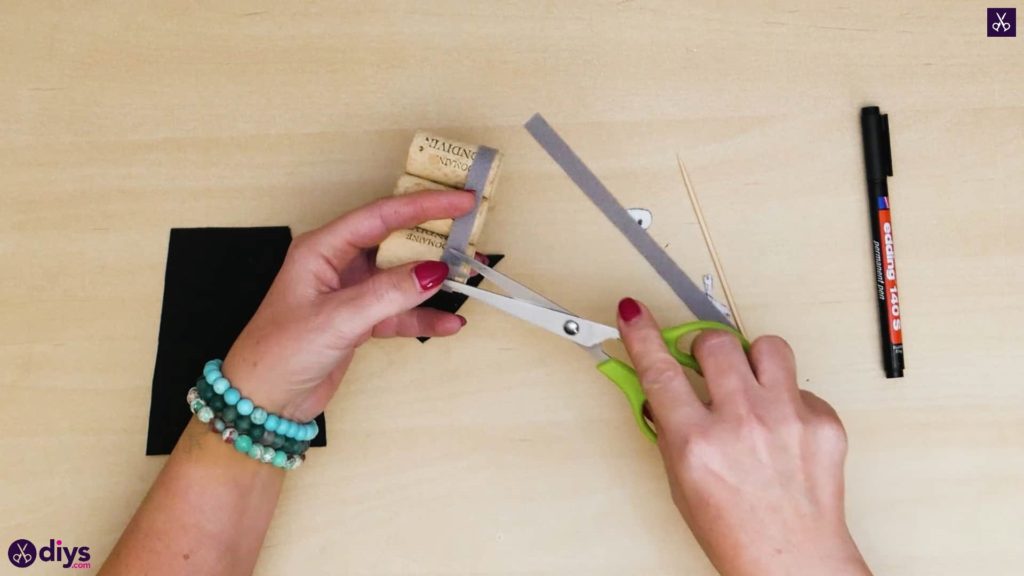
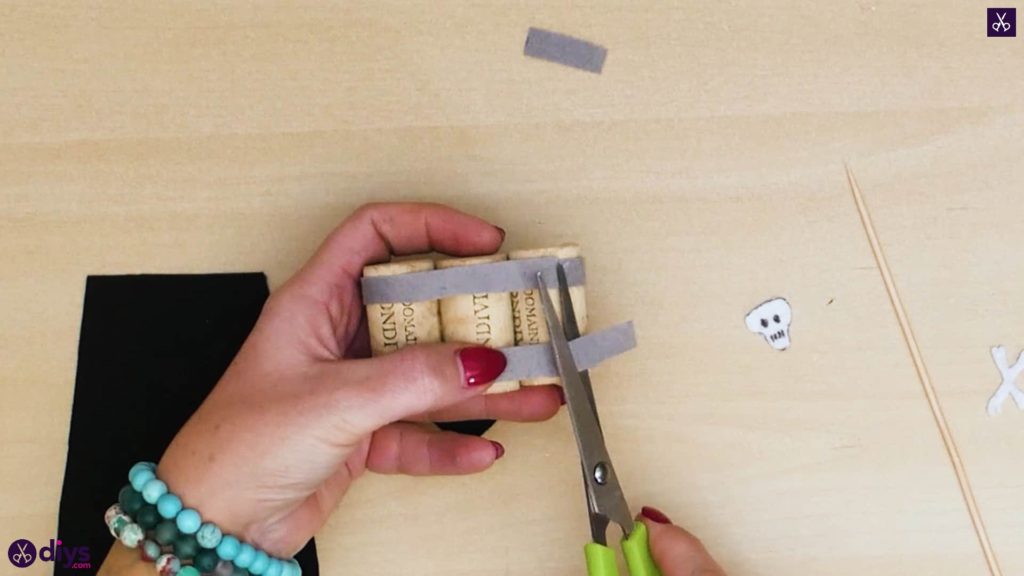
Step 6:
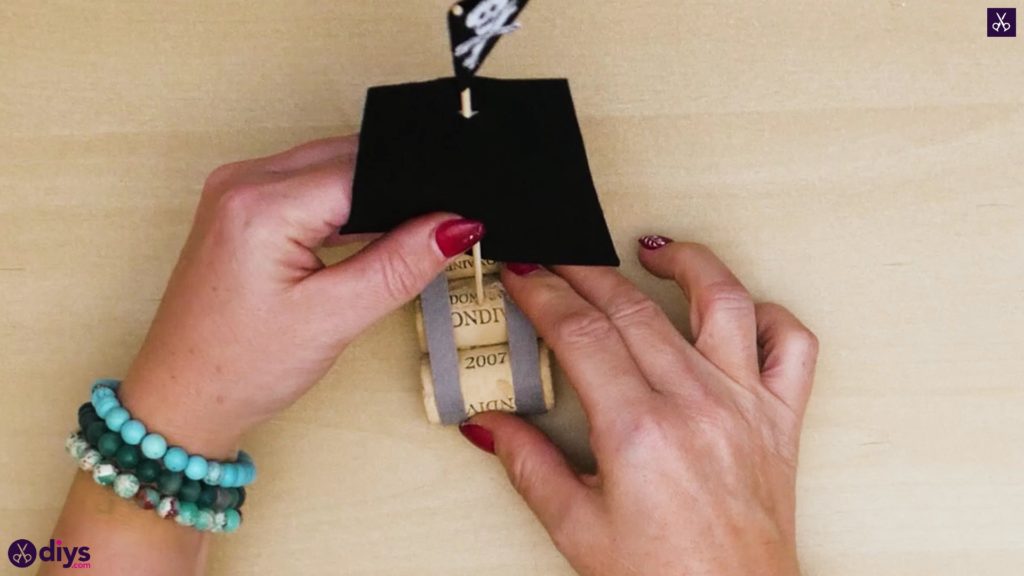
Glue your grey felt strips all the way effectually your 3 corks like a bundle, in the same way corks would lash a wooden raft together. Turn the corks on the table so they look stacked on height of ane some other, with the long side of the bottom ane facing y'all. On the correct side, about a centimetre from the ends of the corks, employ a dot of gum in the centre of the one closest to you and stick the end of one of your gray strips downwardly there, anchoring it in a vertical direction but towards you lot rather than over the corks for at present. Curve the strip downwards and frontward across the bottom sides of your corks, and then up around the other end and back across the tops of the corks, wrapping all the mode around the height of your stacked corks. Employ a dot of glue on peak of the first stop you already anchored down and stick the rest of the strip downward there where the 2 meet, trimming the backlog off. Repeat this entire process on the other side, at the other ends of the corks, with your second strip of felt. I decided to flip the corks over then that the spot where I glued the ends down was on the lesser and wouldn't show on the summit of the transport.
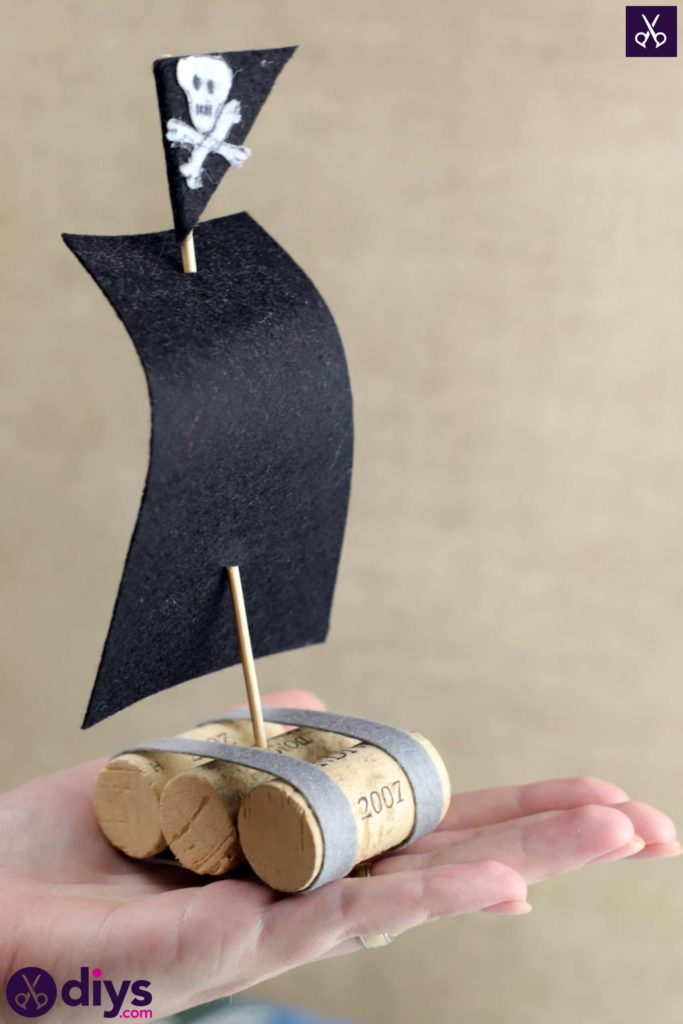
Step 7:
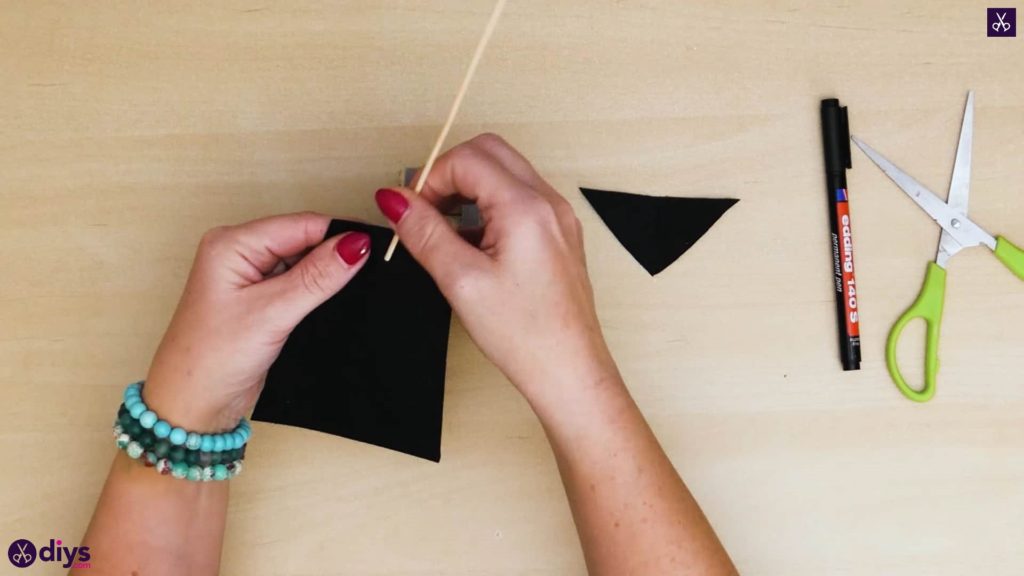
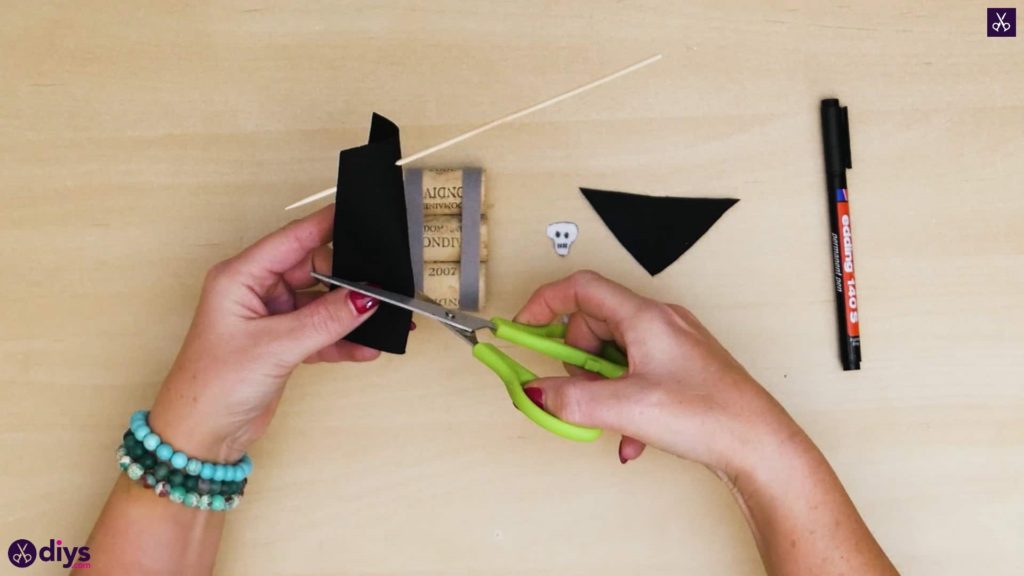
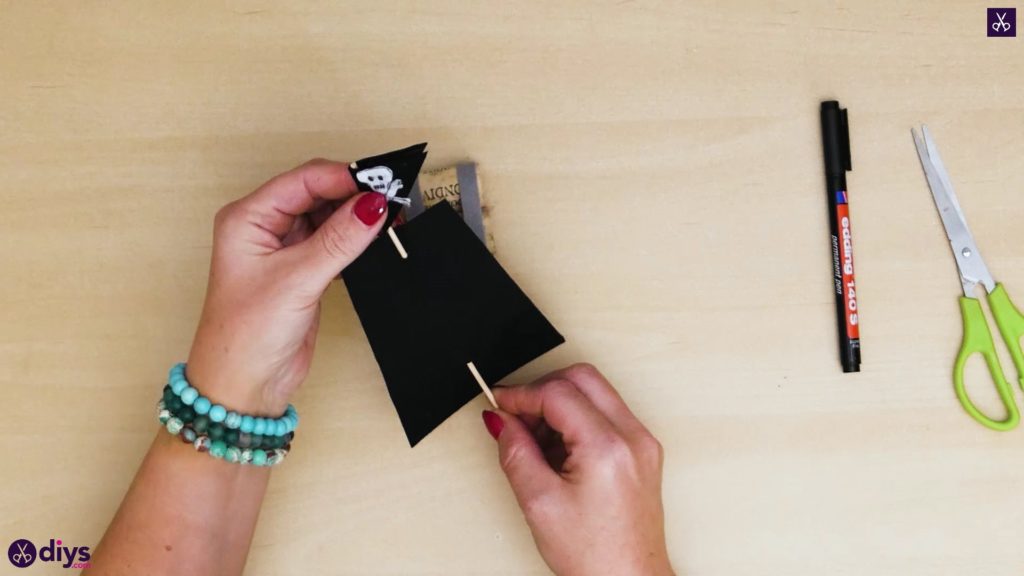
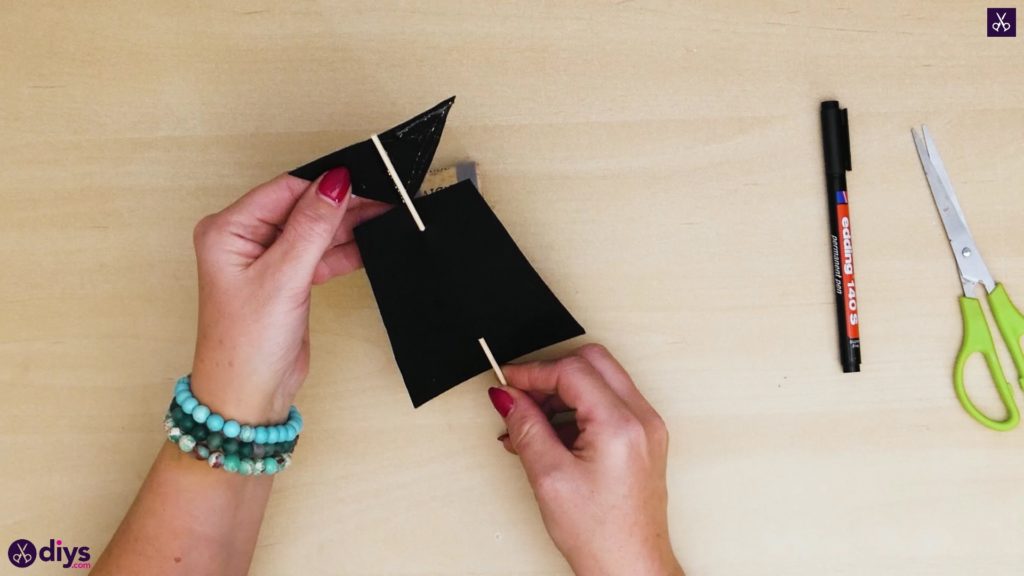
Attach your pirate ship's sail to your wooden kebab skewer, which will be your ship'southward mast! Bend your canvass in half at the top by evenly meeting its corners up, then employ your pair of scissors to make a pocket-sized cut in the resulting bent side, a centimetre or two lower than the top edge. Slide your skewer down through the hole from the top; the side that your skewer passes downwardly volition be the back of the sail and the side where the skewer doesn't prove will be the forepart of the sail. Go out the kebab pushed partially through and repeat the bending and cutting process at the bottom of the sail, a couple centimetres upward from the bottom edge. Then take your wooden skewer and slide its lower end through this bottom pigsty in the sail, and so its end comes back through to the other side again. I adjusted where I wanted the sail to sit down on the "mast" in terms of superlative by sticking the bottom of the skewer (the one that pokes through the wide cease of the sail)into the middle cork correct in the center, then pulling it upwards to where I wanted it to sit down. Brand certain to exit well-nigh an inch at the tiptop of the skewer and so there'south still infinite for your skull and cross bones pirate flag.
Step eight:
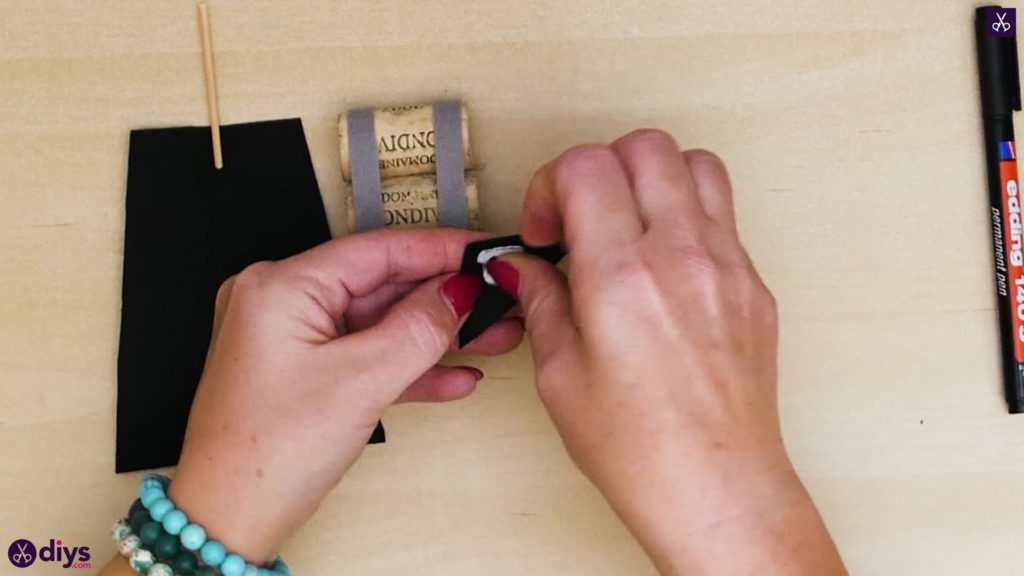
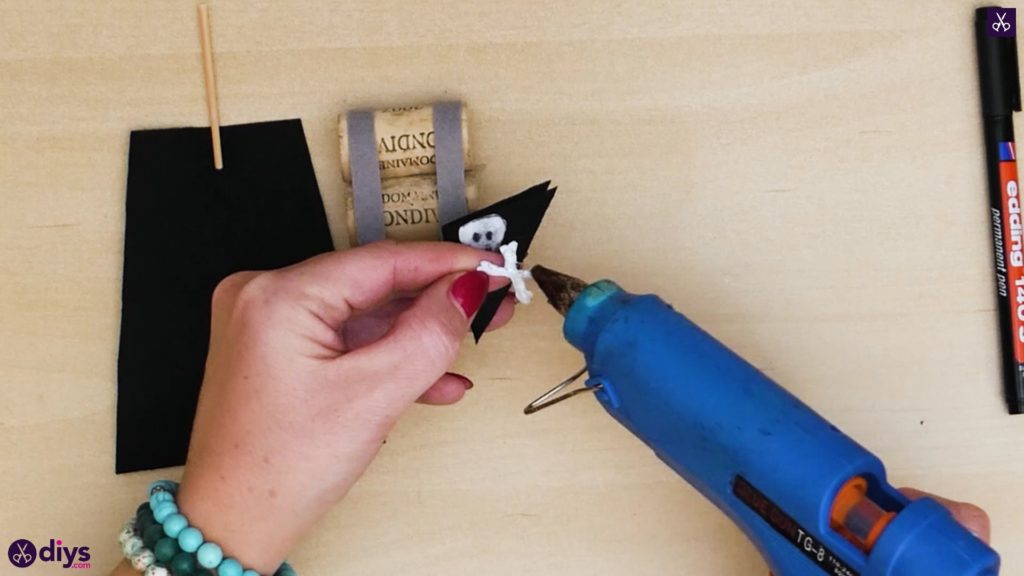
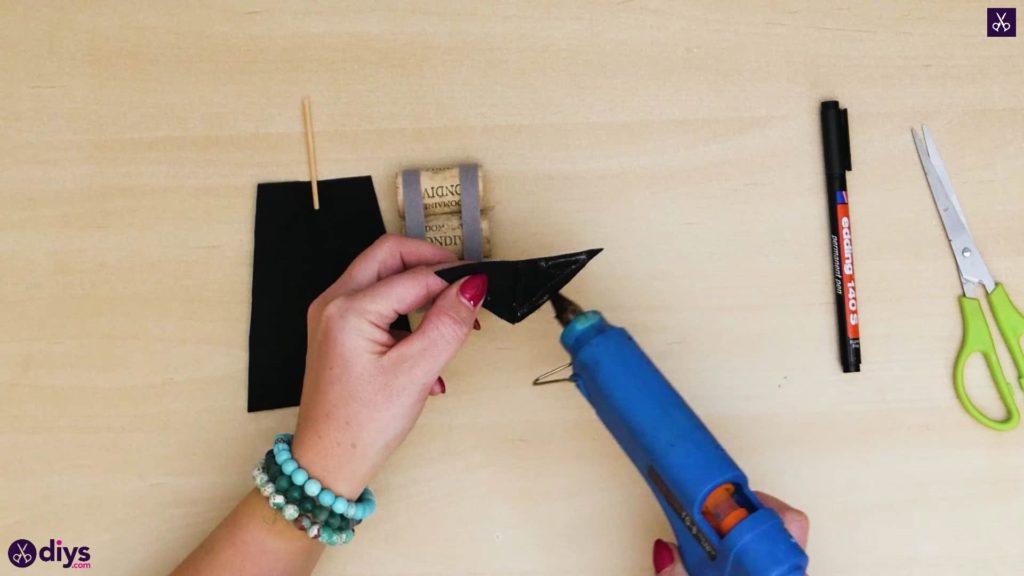
Take your "mast" back out of the cork then you can manoeuvre information technology to attach the pirate flag at the top. Fold the triangular piece in half horizontally by bringing the two points on either side of the long bottom together. This lets you know how much space you have to work with on what will be the front of the last flag. Apply hot glue here on the front and stick down the white felt skull and cross bones that you cut out before on. Once your skull and cantankerous bones is in place, open the flag and apply mucilage along the sides that make up the inside of the flag. Earlier you shut the sides together, put the top tip of the skewer into the centre so it lies at the centre and the sides wrap around the skewer to meet up on the other side. Close the flag sides and stick them together. Finally, apply a flake of gum to the other end of the skewer, below the sail, and stick it back into the centre of the centre cork and so it stands straight up like a mast.
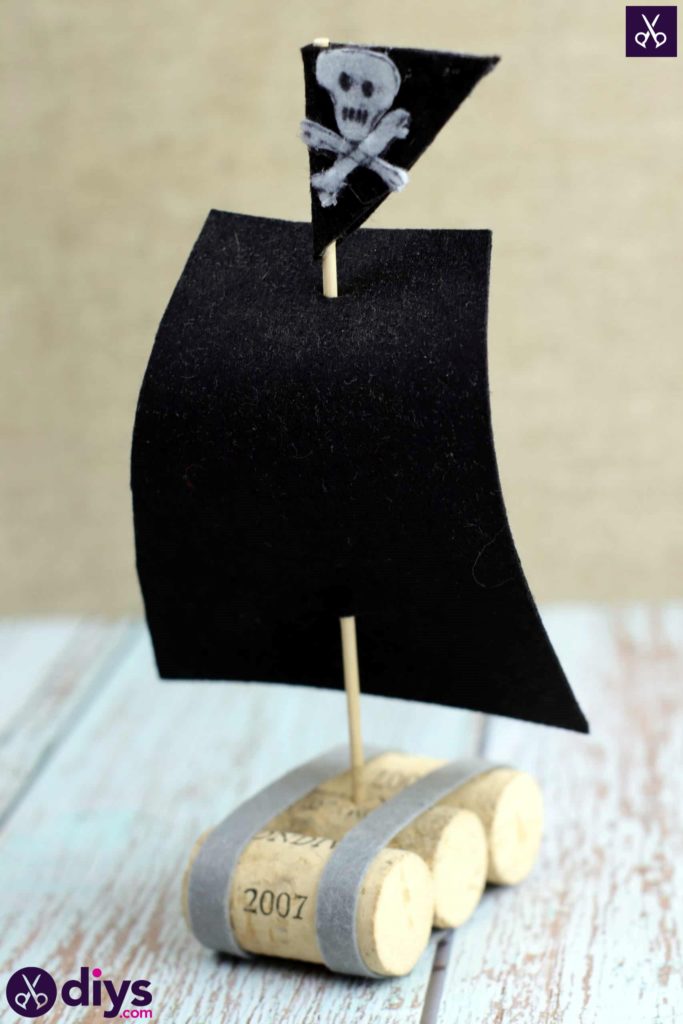
Your pirate ship is all all finished! Thanks to the buoyancy of the corks, it volition even actually float, which my kids got a huge kick out of. Just in case yous'd similar to endeavor this project out for yourself, hither's a fantastic tutorial video to help you!
Source: https://www.diys.com/wine-cork-pirate-ship/
0 Response to "How To Recycle Wine Corks Into a Kids Pirate Ship"
إرسال تعليق